50 Restaurant Flat Icons
A Designer’s First Look: Clean, Friendly, and Ready for Real Threads
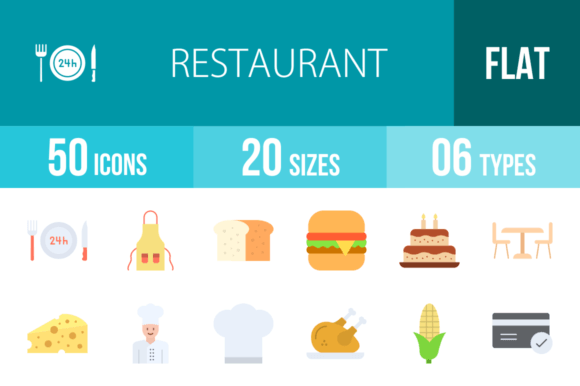
When I opened 50 Restaurant Flat Icons, my first thought wasn’t “Oh, another icon pack.” It was, “These would stitch beautifully on a linen tea towel.” That’s rare. Most flat icon sets feel like screen-only assets—crisp on a monitor but fragile under needle and thread. Not these. The lines are generous, the shapes are confident, and there’s no visual noise: no tiny gradients, no overlapping shadows, no micro-details that vanish once converted to an embroidery file. They’re designed with clarity in mind—not just for UI, but for translation into real-world texture.
What This Set Feels Like in Handmade Practice
I pulled three icons—a coffee cup, a chef’s hat, and a takeout box—and ran them through a quick mockup for a custom embroidered tote bag destined for a local café’s opening weekend. Right away, the simplicity worked in our favor. No fussy outlines meant fewer satin stitch transitions; consistent stroke weight meant predictable fill stitch behavior across fabric types. On medium-weight canvas, the 3.5" versions held crisp edges without puckering. Even better? The negative space between elements (like the steam curling from the cup) stayed legible at 2.75"—a sweet spot for small hoop work on aprons or baby bibs.
Where It Shines in Real Embroidery Projects
- Custom apparel: Works cleanly on sweatshirt cuffs, pocket corners, and sleeve hems—especially when scaled to 2–3". The flat style avoids bulk, so it doesn’t fight knit stretch.
- Tote bags & tea towels: These icons read instantly at arm’s length. No squinting needed. Perfect for boutique branding where recognition matters more than realism.
- Baby embroidery: Soft shapes (think: rounded spoon, friendly pizza slice) suit onesies and burp cloths without feeling too literal or commercial.
- Patches & caps: The clean outlines translate well to applique design. I tested one as a sew-on patch on twill—no fraying, no lost detail, even after light washing.
- Holiday & wedding gifts: A subtle espresso icon on a linen pillow cover? A tiny wine glass stitched onto a napkin set? It adds quiet charm—not clutter.
Where to Pause and Plan Ahead
Don’t assume every icon will behave the same on every surface. Here’s what I watched closely:
- Small hoop sizes (under 3"): Icons with internal cutouts—like the fork-and-knife combo—need extra stabilizer support. Test those first on scrap fabric.
- Textured or thin fabrics: Linen weaves and lightweight cotton pop with these icons, but avoid dense fill stitch areas on gauzy voile unless you add tear-away backing.
- Dark fabric: The flat nature helps—no drop shadows to disappear—but confirm contrast with your thread colors. A navy cap with light gray thread? Yes. Same cap with beige thread? Too low-contrast.
- Curved surfaces (caps, mugs): Stick to single-element icons (coffee bean, whisk, open book) over complex groupings. Simpler shapes adapt better.
- Frequent-wash items (kitchen towels, baby clothes): Avoid icons with ultra-thin connecting lines—they can break down over time. Favor bolder silhouettes like the chef’s hat or oven mitt.
How It Lifts Your Finished Product—Without Saying a Word
Using 50 Restaurant Flat Icons doesn’t just save time—it adds quiet professionalism. Customers notice when stitching feels intentional, not slapped on. A café owner ordering branded aprons isn’t buying pixels; they’re buying trust in your craft judgment. These icons reinforce that. Their consistency across the set means your Etsy listing looks cohesive—even if you use only six icons across ten different products. And because they’re built for scale, your digital embroidery file previews (printable mockups included in many listings) stay sharp whether viewed on mobile or desktop.
Practical Notes Every Embroidery Designer Should Keep Handy
- Always test on scrap fabric first—especially with stretchy knits or textured weaves. What looks balanced on screen may shift slightly under tension.
- Check thread color contrast early. Run a black-and-white mockup before finalizing thread choices—some icons rely on shape alone, not value.
- Review stitch density in your embroidery software. Some flat icons convert with unexpectedly high fill stitch counts. Trim where possible without losing legibility.
- Confirm hoop size compatibility. While the set is labeled “ready for all devices,” embroidery machines vary. Match icon dimensions to your most-used hoops.
- Inspect small details at actual stitch size. Zoom in on corners, curves, and inner cutouts—what reads as clean at 200% on screen may blur at 1:1 stitch output.
- Compare performance on light vs. dark backgrounds. A coffee cup icon might shine on cream linen but fade on charcoal twill—adjust thread accordingly.
- Use proper stabilizer for your fabric + icon combo. Medium-weight cut-away works well for most uses here; tear-away suffices for stable wovens.
- Verify licensing before selling finished items or digital embroidery files. Since 50 Restaurant Flat Icons includes AI, EPS, and PNG formats, confirm commercial use terms directly with the source.
Final Thought: A Quietly Versatile Workhorse
This isn’t a flashy, trend-chasing set. It’s a thoughtful collection of Graphics built for longevity—not just in file format, but in application. As a designer who ships embroidered patches to Etsy sellers, creates custom kitchen linens for small shops, and develops printable mockups for craft business owners, I keep returning to 50 Restaurant Flat Icons when I need reliability without compromise. It fits seamlessly into machine embroidery design workflows, supports handmade product storytelling, and quietly elevates everything from a holiday gift tag to a wholesale apron line. If your next project needs clarity, charm, and zero visual noise—this set earns its place in your embroidery project toolkit.